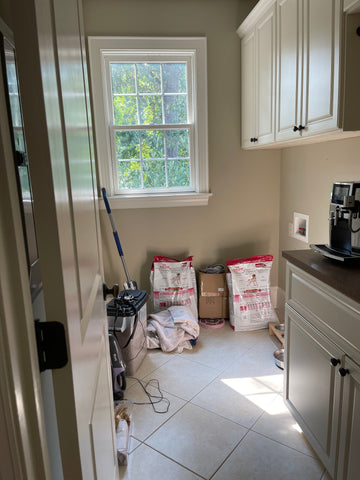
It's ONE ROOM CHALLENGE time again! I have no idea how that happened so quickly. This time, Kevin and I decided we will tackle the space that was formerly a laundry room in our new home. It will become a large (to us) butler's pantry. It is just behind the kitchen space and currently has a small closet pantry as you enter the space. There was a laundry hookup in a closet upstairs so that was already set up when we moved it, and currently the counter in the former laundry room, soon to be Butler's pantry holds our coffee maker and other miscellaneous items (brooms, vacuum etc).
The following companies are sponsoring this project:
The to do list
1. Tear out existing wall between pantry and laundry room.
2. Remove all flooring from space.
3. Move plumbing for sink.
4. Install electric for new lights and remove existing lighting.
5. Install new tile from The Tile Shop on the floor.
6. Have a roman shade made from Morris and Co fabric.
7. Install new cabinetry, counters, sink, lighting, faucet, and wallpaper.
8. Install new reverse osmosis system under sink.
9. Install new beverage fridge and icemaker.
10. Install new wallpaper.
Before

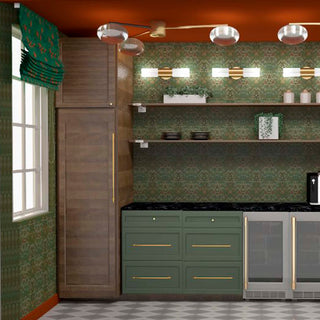
The Plan
I created a rendering for planning purposes of the room. There will be a large cabinet to the right for food storage, a beverage cooler and a icemaker plus a sink in the middle with open shelving. And then to the far left there will be a storage cabinet for cleaning supplies, the vacuum and brooms etc.

